
Recently, I had been looking to move my pirated media away from the Mega + Infuse combo (Mega had been throttling transfers, causing choppy videos). Additionally, I was paying monthly subscription fees for both. So I decided to move everything to a NAS. My main requirement was for the NAS to not be based on x86-64 architecture and especially not an Intel processor. After a tight battle with the TerraMaster F2-212 and ASUS Drivestor 2, I decided to go with the Synology DS223j.
Even though the TerraMaster and Asustor provided more value for money and in some cases more features (Hot swappable drives, 2.5Gbps ethernet expansion), Synology won me over with their superior software and cloud-based backend.
Overall, few weeks later, I don’t regret getting the Synology DS223j at all.
Storage
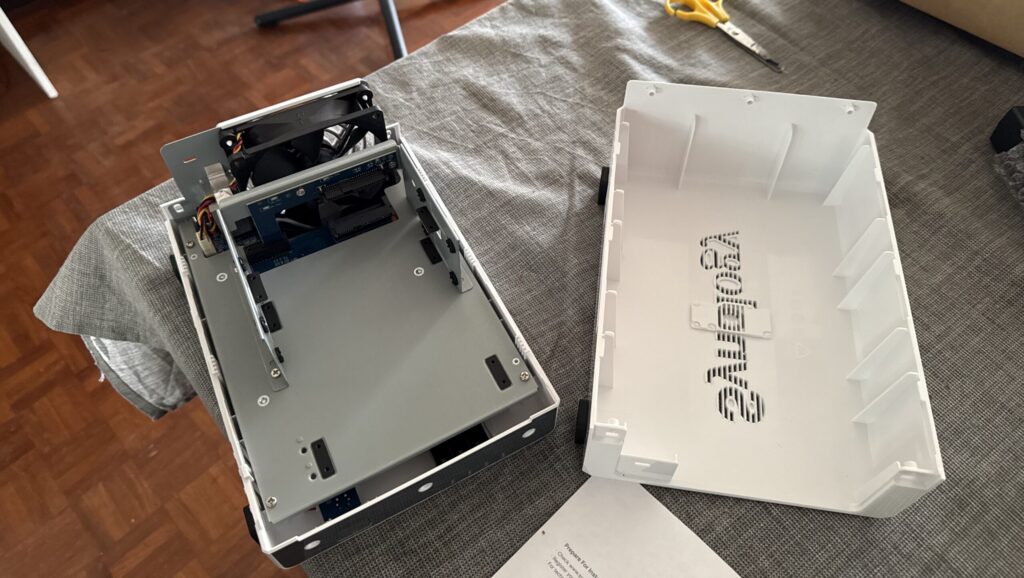
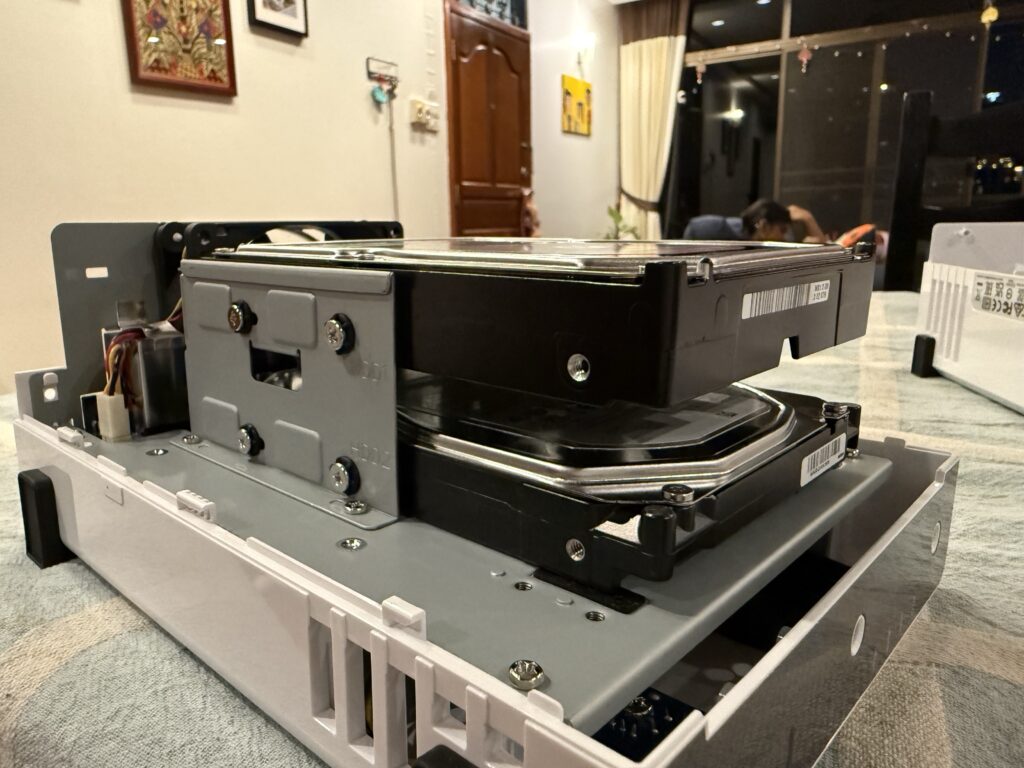
The first action after ordering the NAS was to order the drive(s).
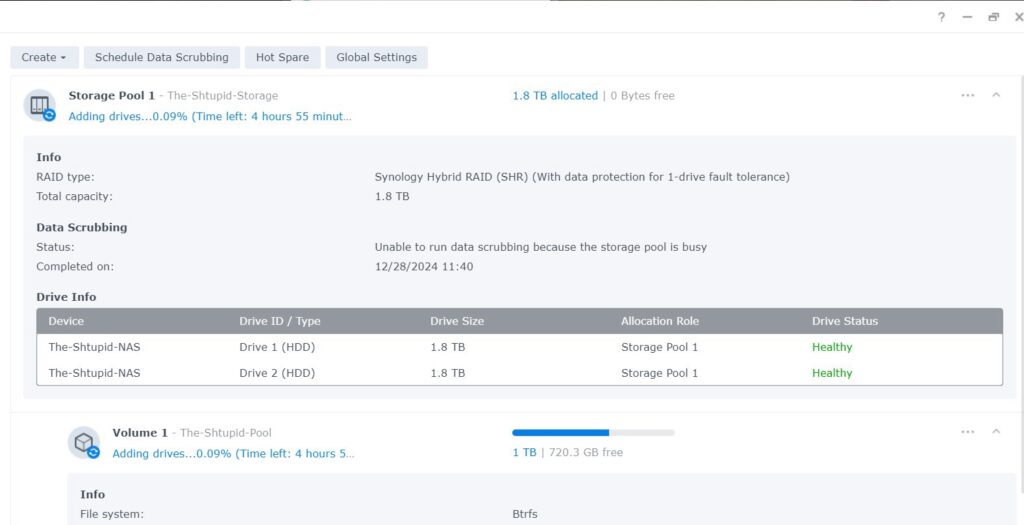
I didn’t need much storage space, but I did need redundancy, so I went with 2x2TB drives.
| Drive | Capacity | Spin | R/W Speed | Cache |
|---|---|---|---|---|
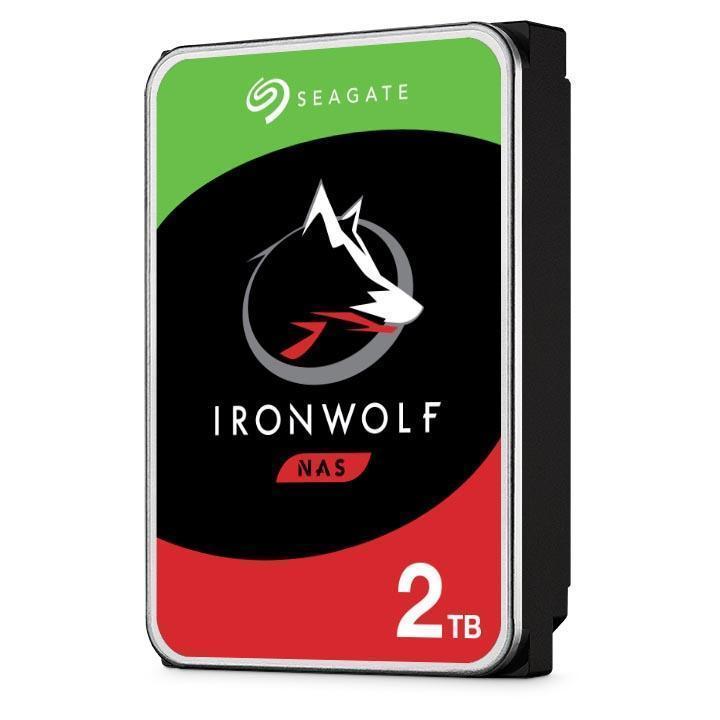
| Seagate IronWolf S2000VN003 | 2TB | 5400 RPM | 180MB/s | 256MB |
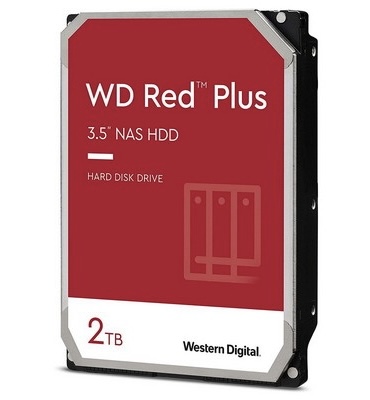
| WD Red Plus WD20EFPX | 2TB | 5400 RPM | 175MB/s | 512MB |
Following best practice, I got 2 drives with similar performance numbers, but different models, as I didn’t want them to fail around the same time. This happens especially if you buy 2 drives of the same model from the same batch.
The DS223j does not support hot swap of drives, you need to open up the NAS chassis and install the drives using screws.
For redundancy, I chose Synology Hybrid RAID, which works well enough.
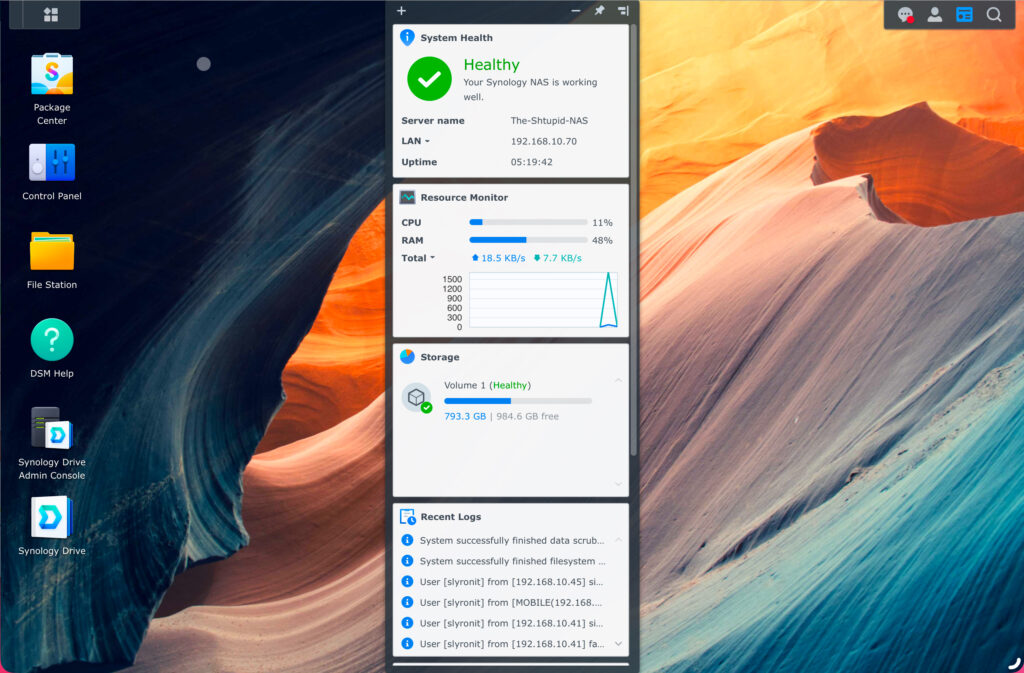
Synology DSM 7
Synology DSM is a web based interface to access your NAS. It is extremely intuitive and powerful. The first time it needs to be accessed using the local IP; once signed in to the Synology account, you can access it via Synology’s cloud-based web app (QuickConnect).
Although Quickconnect can allow inbound connections to your server natively using UPnP, I strongly recommend keeping that disabled on your router and using manual port forwarding rules, instead. It can also check if you configured your router correctly or not.

The Control Panel lets you configure almost any aspect of the NAS, I didn’t have to login using the Linux Terminal even once.
There was a short learning curve over a few days to understand what “storage space”, “volume”, “shared folders” meant and I was able to settle down on the configuration in a few days.It even lets you adjust the brightness of the LEDs on the front of the unit and auto-change them during different times of the day. (The Blue Power LED is especially irritating early mornings).
Next, its time to install apps.
Media Server-1 : Plex
Media sharing was the primary reason for getting the NAS. I created a separate encrypted Shared Folder to store my media on.
I spent sme time researching and comparing Plex, Jellyfin and Emby. I installed Plex because the Pros outweighed the cons
Plex Pros
- Functional, powerful settings
- Fast Library scanning
- Cloud/Plex Account based connectivity <—Some self-hosting purists would consider this a con
- Accurate metadata retrieval
- Natively installable from Synology Package Manager
Plex Cons
- Hardware transcoding does not support ARMv8 processors.
- Hardware transcoding is a paid feature.
- Interface is cluttered, Plex tries to shove its streaming services down your throat (Can get around this by using A 3rd party client like Infuse)
- Plex Relay is massively bandwidth limited, even with a paid subscription. Without this, need to pay for a public IP and also setup port forwarding.
- Plex can see what you have and what you’re watching.
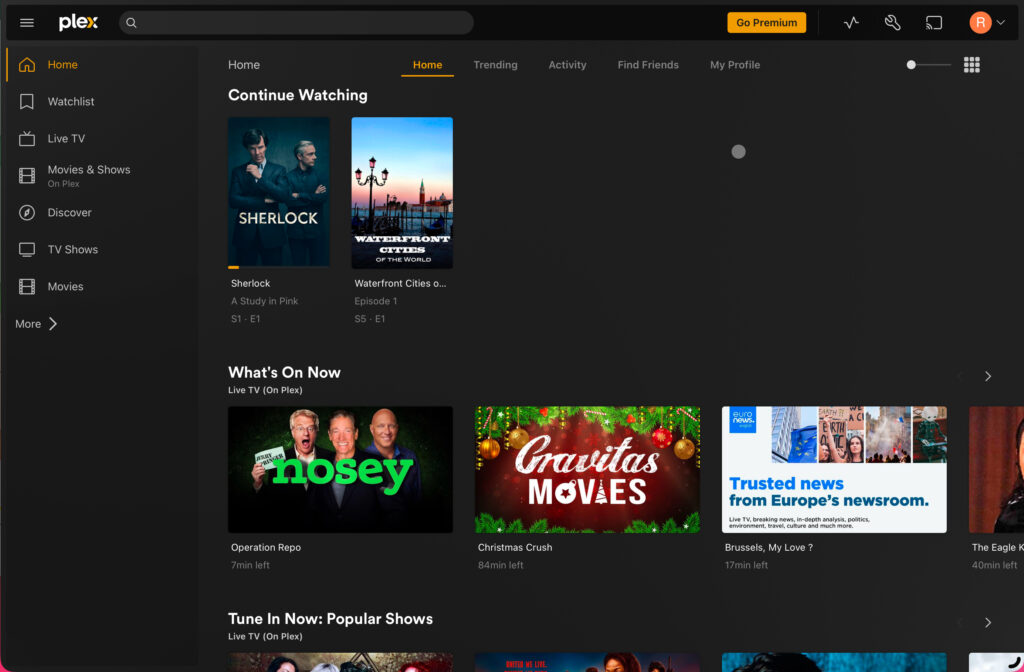
Once installed, the web interface is enabled. You only need to use the local web interface once to sign in to your Plex account. Further access can be via Plex’s cloud-based web app.
Although Plex can allow inbound connections to your server natively using UPnP, I strongly recommend keeping that disabled on your router and using manual port forwarding rules, instead.
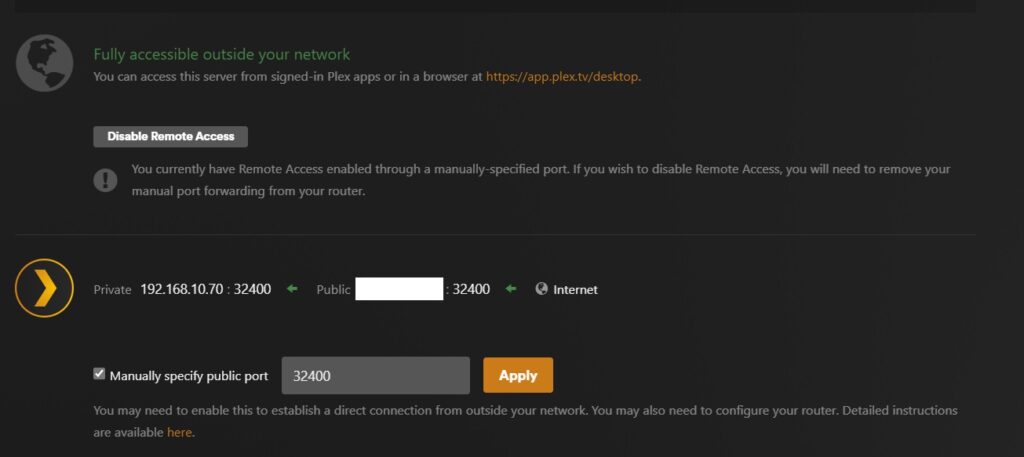
It can also check if you configured your router correctly or not.
Streaming performance is great even without transcoding. I never saw the CPU go above 30% when streaming, nor did I experience skipping and buffering.
Media Server-2. : Jellyfin
I also installed Jellyfin to test it against Plex.
Jellyfin Pros
- Completely open source
- Completely free
- No requirement to have a JellyFin account (The connection is directly between the client and the NAS)
Jellyfin Cons
- Indexing is slow and painful.
- Movie/V Show matching is not as accurate as Plex
- Requires more technical involvement to get it working
- Since there’s no cloud component, you have to manually choose between a local connection and an internet-based connection (Some may consider this a Pro)
On Synology, the easiest way to get Jellyfin up and running is as below:
- Install Jellyfin from Synocommuity using this guide
- Enable https access for Jellyin
- Set up Dynamic DNS and SSL certificate using this guide
- Set up reverse proxy on DSM and point it to Jellyfin using this guide
On clients, you can install the Swiftfin client. However, there’s a catch:
- For devices like TVs, you will obviously connect to Jellyfin server using your local IP
- For mobile devices like iPhone/iPad, the switching is not automatic (Like Plex). When on the same network, you need to connect (over http) using the local IP, when outside, need to connect (over https) using the dynamic DNS name set up previously. I didn’t bother and set up the WAN connection permanently. This means even when I am at home, I am streaming over the internet.
The interface is cleaner than Plex, as in it is not trying to shove its own services down your throat.
Eventually I found Plex to be a better match for me and got rid of Jellyfin.
Private Cloud : Synology Drive
Having a second backup of all my photos (First backup is on iClown) was the other reason for buying the NAS.
The NAS comes pre-installed with Synology Cloud Sync, which can automatically sync with a public cloud. I would have preferred this way, but unfortunately, iCloud is not among the list of supported clouds (The fault is likely on Apple’s side for locking down their ecosystem). So I decided to use my iPad to backup photos from my iCloud to the NAS.
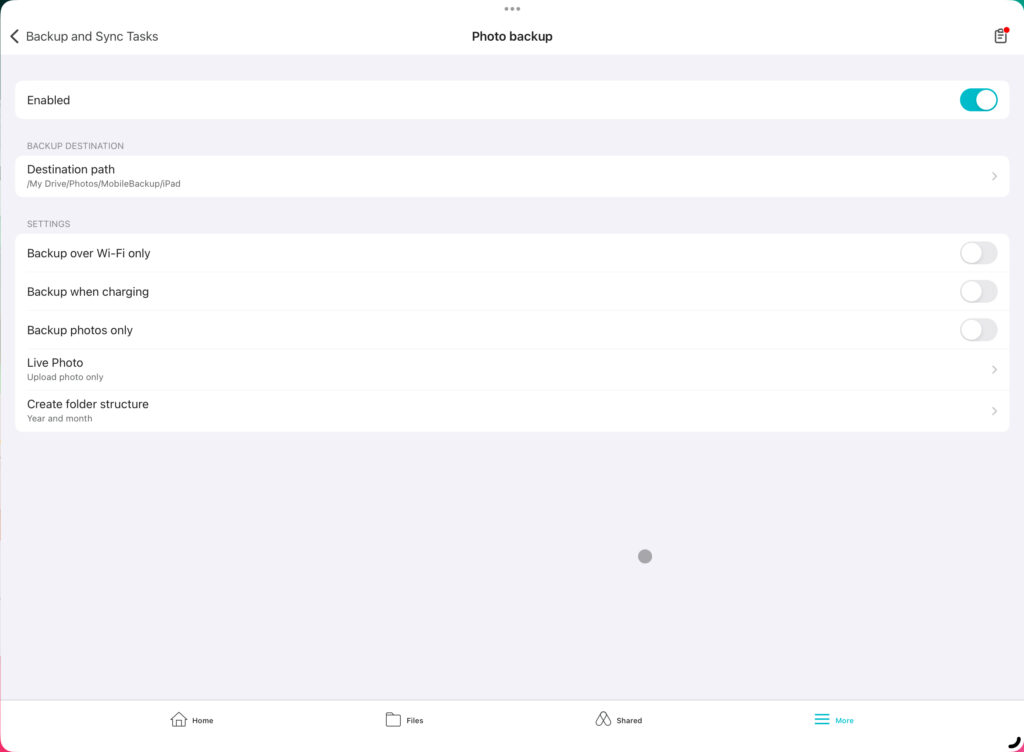
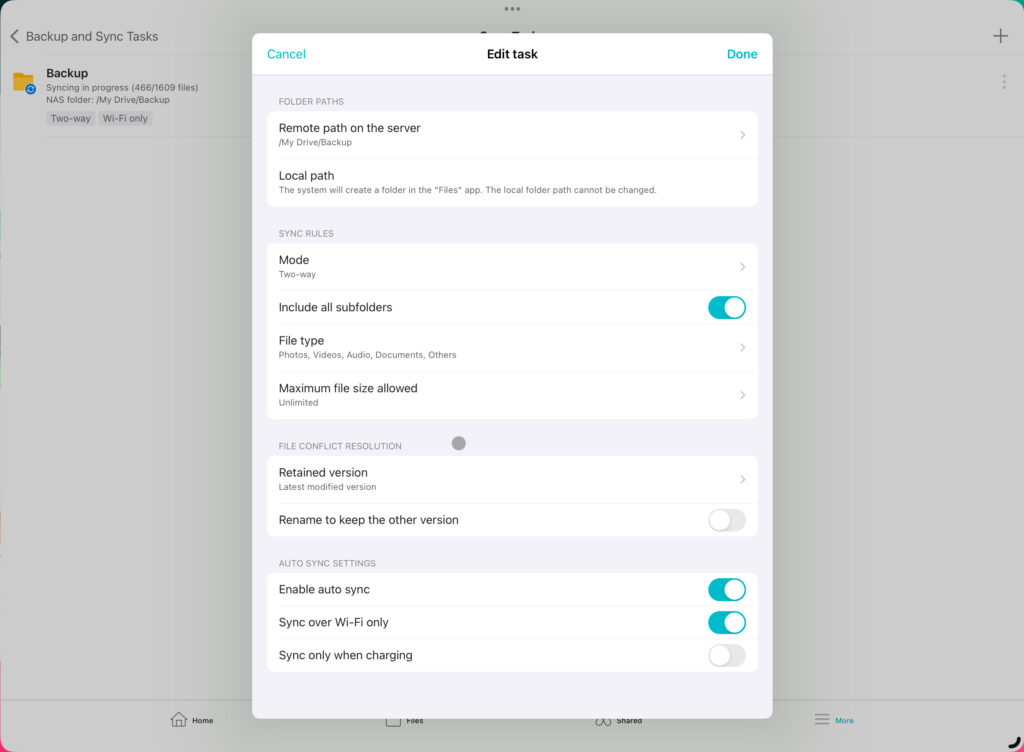
Now, there’re two apps which you can use to backup your photos From your iDevice to your NAS – Synology Drive and Synology Photos. Synology Drive works quite like the Google Drive and OneDrive apps; it can be used for file management and backup. Synology Photos, on the other hand focuses on photos and can also act like a media gallery. Both can backup photos equally well and do, to the same location on the NAS. Both apps are quite well built and designed.
I wanted to treat my photos as files and didn’t want the photo management features, so I went with Synology Drive.
The options to backup files and photos are quite extensive.
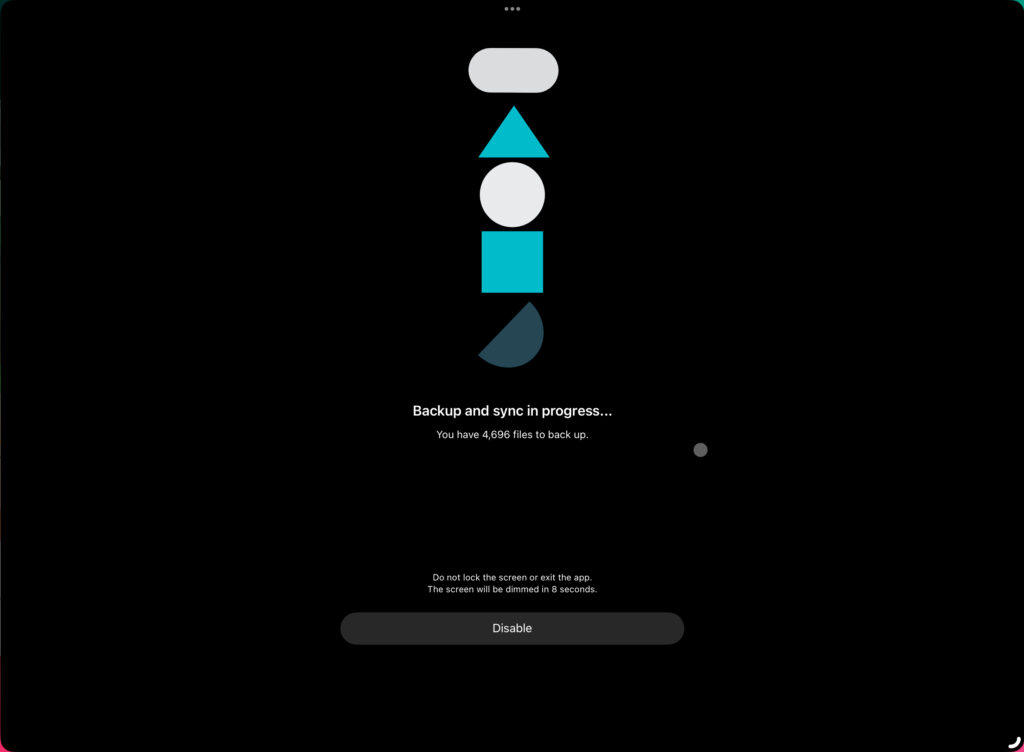
The app automatically backs up new photos in the background, but this process is quite throttled because of Apple’s restrictions. For the first upload, there’s a special focussed backup mode which can keep the app in the foreground, but lower the screen brightness. Using this, I was able to upload all 18000 photos and videos overnight.
Backing up files and documents is a more manual process. You need to frequently copy your files to a dedicated sync folder and the app syncs them from there on.
Apart from requiring manual sync every few days, your device also needs to store 2 copies of each file, which is not ideal. Luckily, it takes less than 10 minutes to upload <20GB of documents (~1800 files).
It’s also a waste of bandwidth, because it synced and overwrites everything, every time, not just changes.
Local Storage : SMB
For local storage and backup, I debated between SMB and AFP. Although AFP did provide faster transfer speeds, I went with SMB because of dwindling support for the former.
DSM provides granular control for multiple users, allowing you to choose which user can access which part of the file system. Eg, I created a separate account for my daughter and assigned a file storage quota on a dedicated shared folder for her MacBook to make nightly automatic backups using Time Machine.
IoT Management : Homebridge
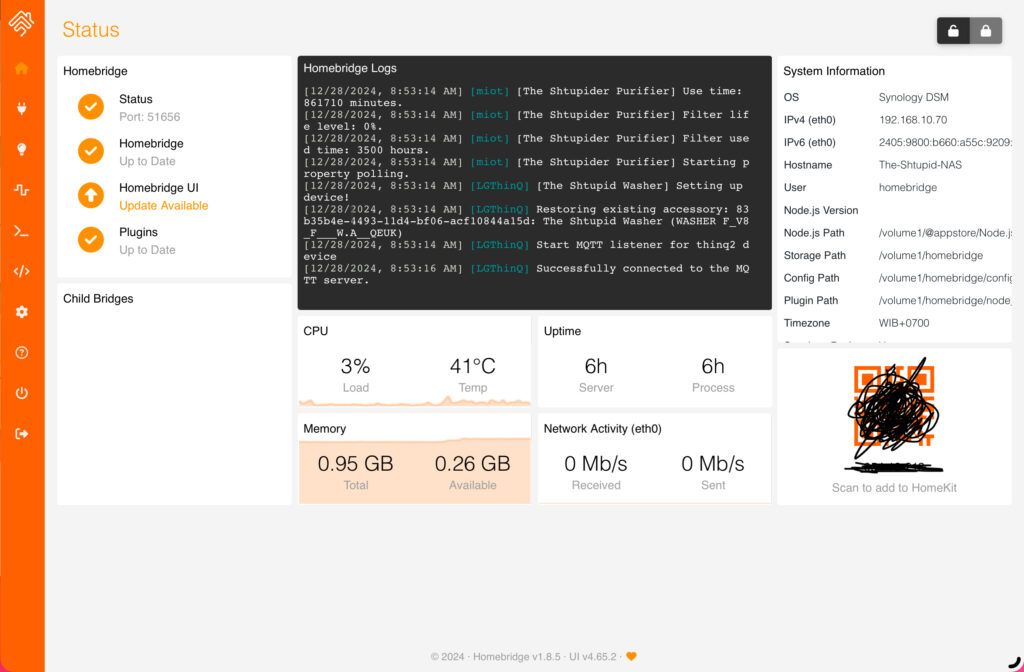
Homebridge allows your NAS to emulate itself as an Apple HomeKit bridge, which further allows you to see non-HomeKit accessories in your Home app. The app is completely open source, and so are the plugins. Ideally you need 1 plugin for each non-HomeKit device you have. I used the below plugins
| Plugin | Device | Data Supported |
|---|---|---|
| Homebridge LG ThinQ | LG ThinQ Washing machine | 1. Operational Status 2. Door Lock status |
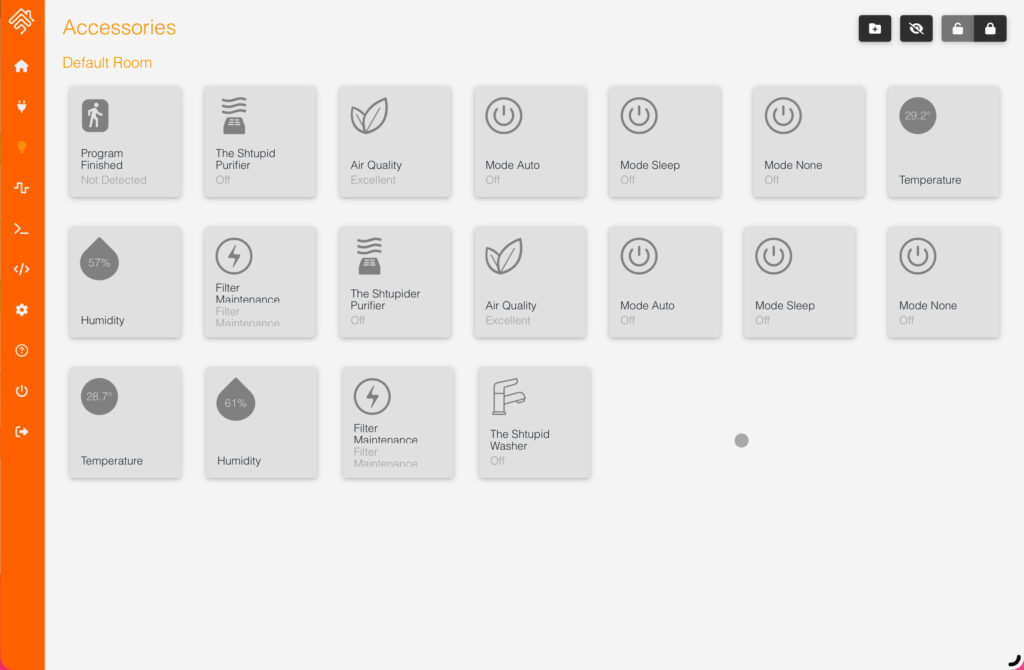
| Homebridge Miot | MI 3C Air Purifier | 1. Operational Status 2. Mode Toggle (Auto/Sleep/Full) 3. PM2.5 level 4. Temperature 5. Relative Humidity 6. Fan speed control |
There are thousands of plugins available, covering almost every vendor of smart home devices.
Unlike Plex, Homebridge is not natively available in the Synology Package Manager, you need to add a new repository and install from there.
Your IoT devices need to have a consistent IP address on the local network, I suggest setting up DHCP binding on your router. Some of the plugins have quite an involved process of adding devices, but thankfully it is a one time thing. Once done, the data from your accessories will appear in the Homebridge UI.
Once you add your Homebridge as a HomeKit bridge in your Apple Home, the data is further relayed to the Home app on all your devices.
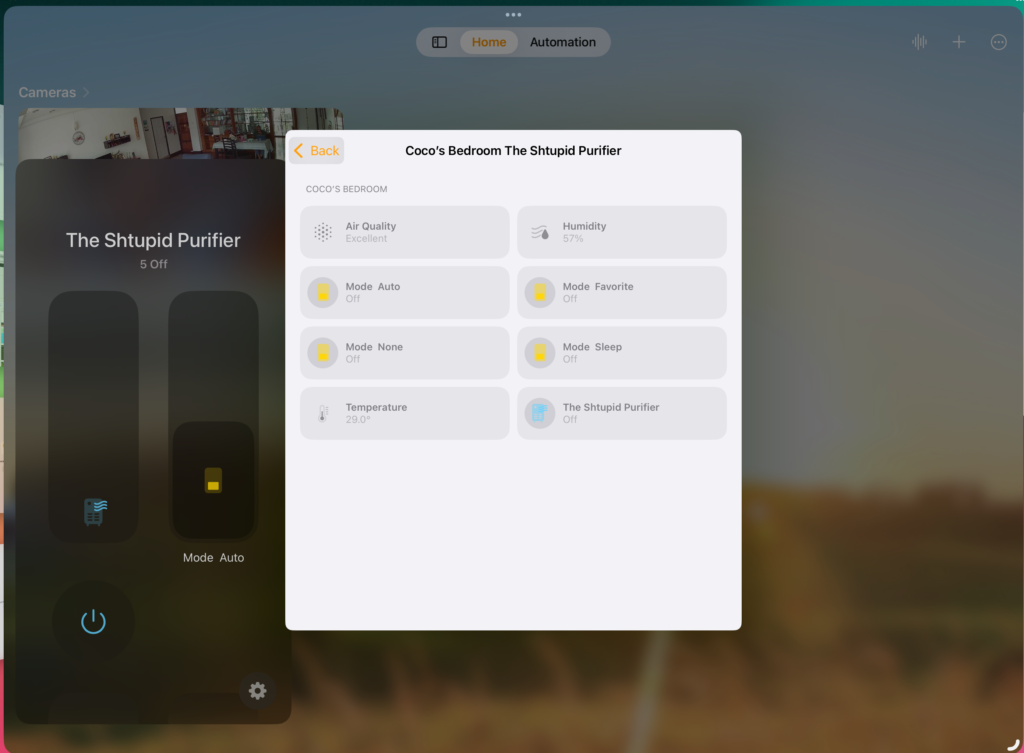
The experience is not as seamless as native HomeKit devices and this is not what I bought the NAS for, but it was a pleasant bonus, nonetheless.
Antivirus : Antivirus Essential
Antivirus Essential is Synology’s antivirus solution. I am not sure how effective it is, but it is a pain to run the first time. The first “full scan” took 4 days with the NAS too busy to do almost anything else during that time. Even the first time update of virus definitions takes hours.
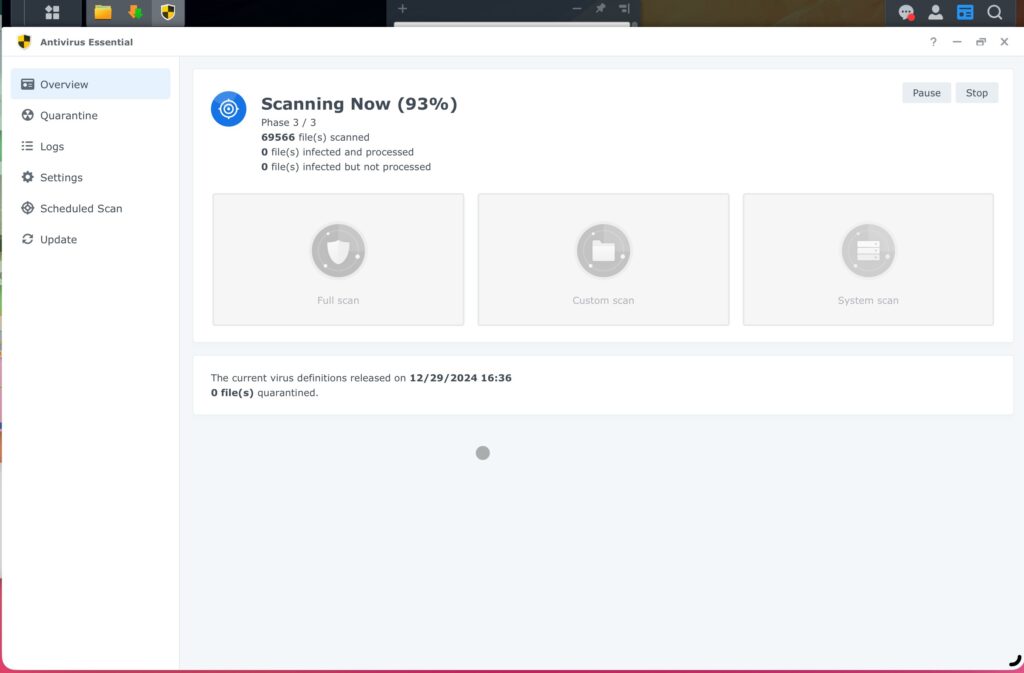
Thankfully, if you enable “smart scan”, subsequent scans are much faster (Around an hour).
Probably the performance is much better on more powerful units.
Download Manager : Download Station
Download Station is Synology’s web based download manager. For a first party app, it is quite powerful. It can download files from a wide variety of URLs & P2P file types.
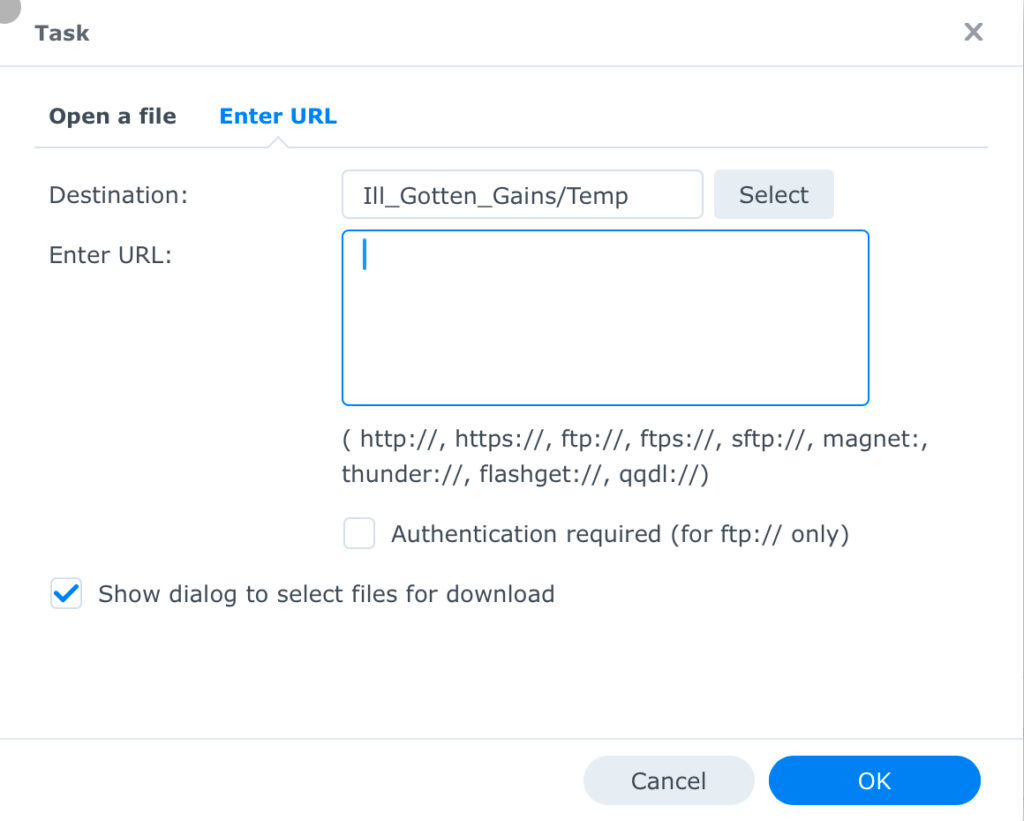
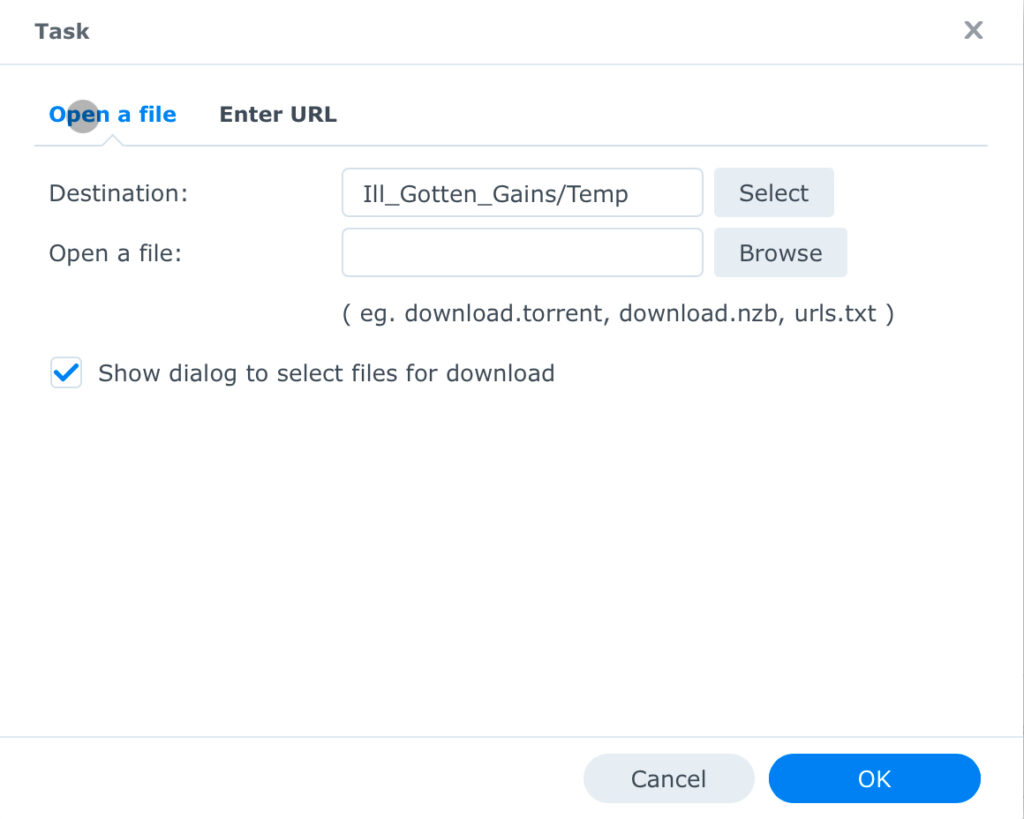
You can even download using RSS feeds. It is not as powerful as some dedicated clients, but it is good enough that I don’t use a 3rd party utility.
It even supports eMule!